
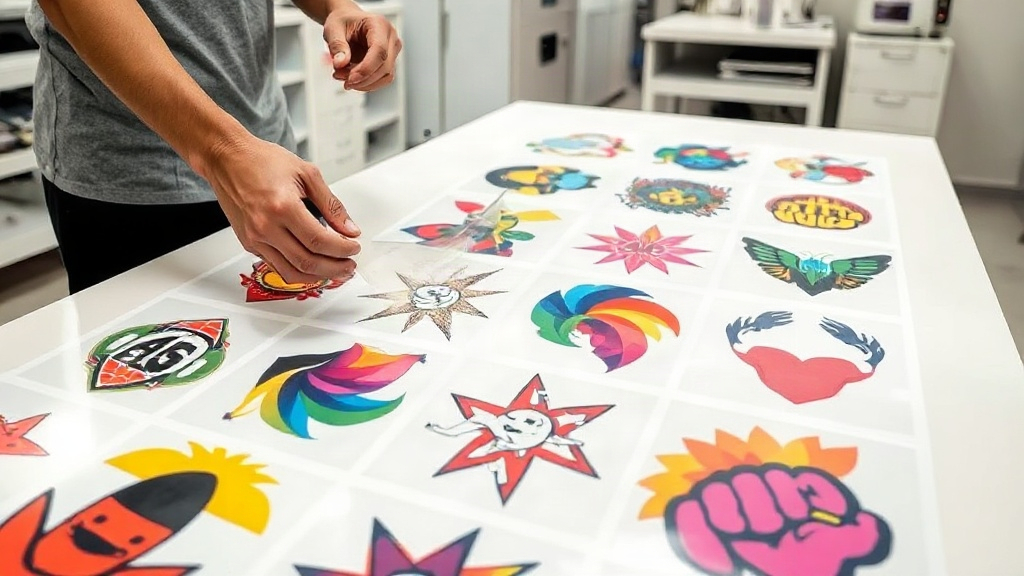
If you're in the custom apparel business, you've likely heard the buzz around DTF printing. It's a game-changer for printing vibrant, full-color designs on various fabrics. But as your order volume grows, you quickly realize that printing one design at a time is inefficient and costly. That's where the DTF gangsheet comes in. This guide will walk you through everything you need to know about gangsheets, from what they are to how they can transform your production process.
What is a DTF Gangsheet?
A DTF gangsheet is a single large sheet (usually a roll of film) that contains multiple DTF transfers arranged together. Instead of printing each design separately, you group them into one layout, maximizing the use of the film and reducing waste. Think of it as a digital sticker sheet for your DTF printer. The term 'gang' refers to grouping multiple items together, and 'sheet' refers to the film. By combining designs, you can print many transfers in one pass, saving time, money, and effort.
Why Use a DTF Gangsheet?
The benefits of using a DTF gangsheet are numerous, especially for businesses that handle a variety of designs or small batches. Here are the key advantages:
- Cost Efficiency: DTF film and powder are expensive. By nesting designs closely, you use less film per transfer, lowering your cost per print. You also save on ink and powder because there's less waste.
- Time Savings: Printing a single gangsheet with 50 designs takes about the same time as printing one large design. You can produce more transfers in less time, speeding up order fulfillment.
- Consistency: When you print multiple designs on one sheet, they all go through the same curing and powdering process, ensuring consistent quality across the board.
- Versatility: You can mix and match different designs, sizes, and even different types of transfers (e.g., logos, numbers, names) on one sheet, as long as they fit within the dimensions.
- Reduced Waste: By optimizing the layout, you minimize unused areas of the film, which is both environmentally friendly and cost-effective.
How to Create a DTF Gangsheet
Creating a gangsheet involves several steps, from design preparation to printing. Here's a step-by-step guide to help you get started.
1. Gather Your Designs
Collect all the designs you need to print. They can be in various formats (PNG, JPG, PDF, etc.), but for best results, use high-resolution images with transparent backgrounds. If you're using a design software like Photoshop or Illustrator, ensure each design is on its own layer.
2. Choose the Right Film Size
DTF film comes in rolls of various widths, commonly 13, 17, 22, and 24 inches. The length can be customized based on your printer's capabilities and your needs. Decide on the width that accommodates your designs and minimizes waste. For example, if most of your designs are 10 inches wide, a 13-inch film might be sufficient, but a 17-inch film could allow more flexibility.
3. Use Gangsheet Builder Software
Manually arranging designs can be tedious. Fortunately, many DTF printers come with dedicated software or you can use third-party tools like Gangsheet Builder, DTF Gang Sheet Builder, or even Photoshop with a template. These tools allow you to import designs, resize them, and arrange them efficiently. They often have features like auto-nesting to maximize space usage.
4. Optimize the Layout
Arrange your designs to fill the sheet as much as possible without overlapping. Leave a small gap (about 0.1 to 0.2 inches) between designs to prevent them from merging during printing. Rotate designs if needed to fit better. Remember that DTF transfers are printed in reverse, so ensure your designs are mirrored if they contain text. Also, consider the grain of the film; usually, it doesn't matter, but some printers prefer a specific orientation.
5. Print and Cure
Once your gangsheet is ready, send it to your DTF printer. After printing, you'll need to apply hot melt powder and cure the transfers. Follow your printer's and powder's recommended settings for temperature and time. Typically, curing is done at around 320°F (160°C) for 2-3 minutes. After curing, the gangsheet is ready to be cut into individual transfers.
Tips for Maximizing Efficiency with Gangsheets
- Plan Ahead: Group designs by size or color to streamline cutting and pressing. For example, if you have many small logos, place them together.
- Use Nesting Software: Invest in software that automatically arranges designs to minimize waste. Some RIP software includes nesting features.
- Standardize Sizes: If possible, standardize the sizes of your transfers. This makes layout easier and more predictable.
- Keep a Library: Maintain a library of frequently used designs so you can quickly add them to gangsheets.
- Test Print: Before committing to a large gangsheet, do a test print on a smaller scale to ensure everything looks good.
- Mind the Gaps: Leave enough space between designs to avoid accidental merging during powdering or curing.
Common Mistakes to Avoid
Even experienced printers make mistakes with gangsheets. Here are some pitfalls to watch out for:
- Overcrowding: Trying to fit too many designs can lead to overlapping and misprints. Leave breathing room.
- Forgetting to Mirror: DTF transfers are applied face down, so text and asymmetric designs must be mirrored.
- Inconsistent Sizing: Double-check that all designs are the correct size. A small error can ruin a whole sheet.
- Ignoring Film Direction: Some films have a coating on one side; ensure you print on the correct side.
- Skipping Powder: Forgetting to apply powder or not curing properly will result in transfers that don't adhere.
Ordering DTF Gangsheets from a Service
If you don't have a DTF printer or want to outsource, many companies offer gangsheet printing services. You simply upload your designs, specify the film width and length, and they'll print and ship the gangsheet to you. This is ideal for small businesses or those just starting out. When choosing a service, consider turnaround time, price per square inch, and customer reviews. Some services also offer gangsheet builder tools to help you arrange your designs.
Frequently Asked Questions about DTF Gangsheets
How many designs can I fit on a DTF gangsheet?
The number depends on the size of your designs and the dimensions of the film. For example, on a 13x19 inch sheet, you could fit dozens of small logos or a few large prints. Use a gangsheet builder to maximize space.
Can I mix different designs on one gangsheet?
Absolutely. You can mix any designs as long as they fit within the sheet boundaries and you leave adequate spacing. Just ensure all designs are properly mirrored if they contain text.
What file format is best for DTF gangsheets?
PNG with transparent background is ideal because it preserves the transparency and high resolution. Some printers also accept PDF or TIFF. Avoid JPG as it doesn't support transparency.
How do I cut a DTF gangsheet?
After curing, you can cut the transfers using scissors, a guillotine cutter, or a vinyl cutter with a contour cut feature. For precise cuts, use a cutter with a laser guide.
Do I need special software to create a gangsheet?
Not necessarily. You can use graphic design software like Photoshop or Illustrator, but dedicated gangsheet builder tools make the process faster and more efficient with features like auto-nesting.
Mastering the DTF gangsheet is a skill that pays off in both time and money. Whether you print in-house or outsource, understanding how to optimize your layouts will set you apart. Start small, experiment with different arrangements, and soon you'll wonder how you ever managed without gangsheets.