
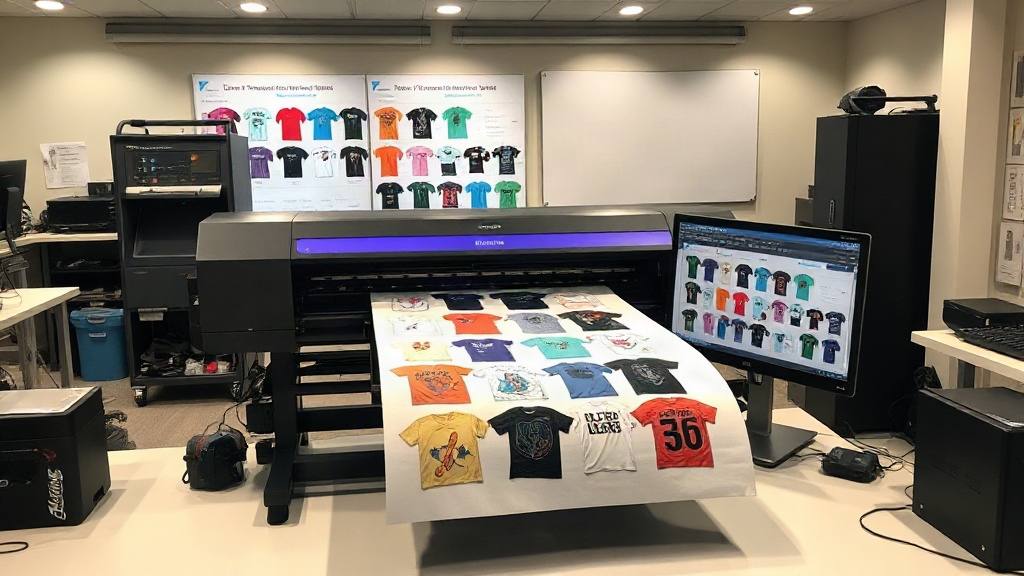
If you're in the custom apparel business, you've likely heard about DTF printing. It's a game-changer for vibrant, durable transfers on various fabrics. But to truly scale your production, you need a tool that organizes multiple designs into a single sheet: a DTF gangsheet builder. This guide will walk you through everything you need to know, from basics to advanced strategies, so you can print smarter, not harder.
What Exactly Is a DTF Gangsheet Builder?
A DTF gangsheet builder is software or an online tool that helps you arrange multiple DTF transfer designs onto a single large film sheet. Instead of printing each design individually, you combine them into one compact layout. This approach, known as gang sheet printing, maximizes your printer's efficiency and slashes material waste.
Think of it as a digital puzzle. You upload your artwork, and the builder automatically or manually positions them to fit snugly, leaving minimal empty space. The result? A single sheet packed with all the transfers you need for a day's orders.
Why You Should Use a DTF Gangsheet Builder
If you're still printing one design at a time, you're leaving money on the table. Here's why a builder is essential:
- Cost savings: DTF film and powder are expensive. Gang sheets reduce waste by using every inch of the sheet.
- Time efficiency: Print dozens of designs in one go instead of multiple runs. Less setup, more output.
- Consistency: All transfers on a sheet share the same print settings, ensuring uniform quality.
- Scalability: Easily handle large orders without increasing labor.
For a busy shop, these benefits add up quickly. A well-optimized gang sheet can cut your material costs by 30% or more.
Key Features to Look for in a DTF Gangsheet Builder
Not all builders are created equal. When choosing a tool, prioritize these features:
1. Automatic Nesting
This algorithm arranges designs to minimize gaps. Good builders offer rotation and mirroring options to fit odd shapes.
2. Roll and Sheet Support
Some printers use rolls, others use pre-cut sheets. Your builder should handle both, letting you set custom dimensions.
3. Design Library Integration
If you frequently print the same logos, a library saves time. Look for tools that let you save and reuse designs.
4. Resolution and Color Management
Ensure the builder preserves image quality and supports CMYK or RGB profiles. Poor color handling leads to dull transfers.
5. Export Options
You'll need to export as PDF, PNG, or TIFF at 300 DPI. Check compatibility with your printer's RIP software.
How to Create a Gang Sheet: Step-by-Step
Ready to build your first sheet? Follow this workflow:
- Prepare your designs: Ensure each artwork is high-resolution (300 DPI), with transparent backgrounds for clean cutting.
- Choose your sheet size: Standard DTF film comes in widths like 13", 17", or 24". Length can be custom, but start with 12" or 24" sheets.
- Upload to your builder: Drag and drop files into the interface. Most tools accept PNG, JPG, and PDF.
- Arrange and nest: Use auto-nesting, then fine-tune manually. Rotate designs to fill gaps. Leave at least 0.25" between designs for easy cutting.
- Add registration marks: These help align the film during transfer. Most builders add them automatically.
- Export and print: Save as a high-res file and send to your DTF printer.
Pro tip: Always print a test sheet with new designs to check color and adhesion.
Common Mistakes to Avoid with Gang Sheets
Even seasoned printers slip up. Watch out for these pitfalls:
- Overcrowding: Leaving too little space between designs makes cutting a nightmare. Keep at least 0.25" gaps.
- Ignoring grain direction: DTF film has a slight grain; rotating designs can affect stretch. Test before committing.
- Forgetting bleed: If designs have borders, add 1-2mm bleed to avoid white edges after cutting.
- Using low-res images: Enlarging small images leads to pixelation. Always start with high-res art.
- Not updating software: Builders improve with updates. Regular updates fix bugs and add features.
Advanced Tips for Power Users
Once you're comfortable with the basics, try these strategies to level up:
Batch by Color Profile
Group designs with similar color palettes on the same sheet. This reduces ink switching and improves color consistency.
Utilize Negative Space
Fill gaps with small designs like logos or tags. Even tiny transfers add value.
Create Templates
If you print recurring orders, save layouts as templates. Next time, just swap designs.
Monitor Printer Maintenance
Gang sheets mean longer print runs. Keep your printer in top shape with regular cleanings and nozzle checks.
Frequently Asked Questions
What is the ideal resolution for DTF gang sheet designs?
Always use 300 DPI at the final print size. Lower resolutions may look fine on screen but will appear blurry when transferred.
Can I mix different design sizes on one gang sheet?
Absolutely. A good builder lets you scale designs individually. Just ensure they all fit within your sheet dimensions.
How do I calculate the cost per transfer on a gang sheet?
Divide the total cost of film, powder, ink, and labor by the number of transfers. Gang sheets typically reduce per-unit cost by 20-40%.
Do I need special software for gang sheet building?
Many online tools are free or offer trials. For high-volume shops, dedicated software with advanced nesting is worth the investment.
What's the maximum sheet size for DTF printing?
It depends on your printer. Common widths are 13", 17", and 24". Length can be continuous on roll-fed printers, but for sheets, 24"x36" is a practical max for most desktop models.
Final Thoughts
Mastering the DTF gangsheet builder is a skill that pays off. It transforms your printing from a tedious task into a streamlined process. Start with small sheets, experiment with nesting, and soon you'll wonder how you ever managed without it. Remember, efficiency is the name of the game in custom apparel. So fire up your builder, and let's get printing!